

I have now put together an article with documents for interested replica builders about the construction and implementation of the entire project. There is also a small photo gallery.
I planned the pond and the hide from the point of view of photography in an east-west direction. The birds are most active in the morning and mid-morning, so I need good and not too harsh light that illuminates the subjects from the front. But there would also be the opportunity to take photos from a Western hide point in the afternoon, that was the plan.
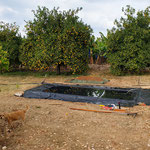
For the pond I had to level an area of 4x2m with a height difference of approx. 30 cm. Since I dug everything up by hand and our garden is very rocky with slabs of rock, it wasn't easy to work with. I finely sieved the excavated soil so that I could later use the fine material as a substructure for the pond liner.
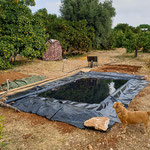
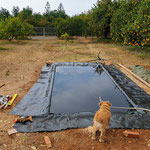
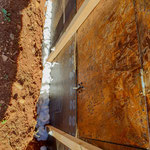
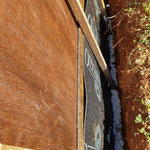
The pond liner with the dimensions 4x3 m is 1mm thick and came pre-cut from Germany. The pond liner has an overhang on the left and right sides that covers the side edges. I built the side edges using soil to compensate for the slope, then additionally with 4 m long plastic pipes DN125 mm. The conclusion then form 4 m long wood 30 x 60 mm. The free ends were modeled with stones and soil, which are later to form the planned resting areas for the birds. After spreading the fine soil, a foil is laid out against growth from below in the next step, then the pond foil, as you can see in the photos. Then you can fill it with water and see that the foil lies neatly in the rounded corners.
I then got large, rounded stones at the sea and thus formed the first steps in the water space at the ends for the further design of the approach zones. The pit for recording the hide hut is created at a distance of 1.5m from the pond, so the entire photo area remains behind the pond with 1.5m to 5.8m in the usable focal length range of a 100-400mm and 150-600mm lens.


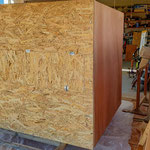
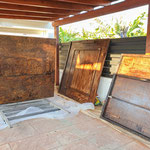
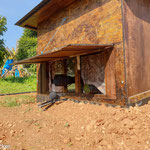
For the construction of the hide hut, I first inquired which materials are available here on the island and at what prices. Since everything is imported, it quickly became clear to me that my preferred version with 9mm thick screen printing plates will probably remain a dream.
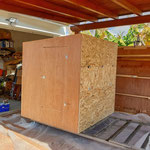
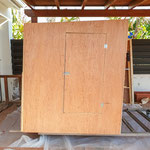
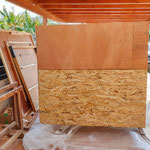
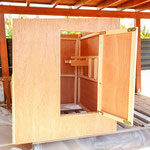
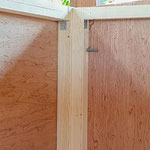
However, it is definitely recommended for the weather conditions in Europe and Germany. Ultimately, I decided on a divisible frame construction with squared timber 5x5 cm and an outer skin made of 4-6mm boat plywood. In addition, I have also taken over the delivery sizes of the panels with 2400x1220mm for the lateral dimensions of the hut. The width of the hut is 1400mm and is sufficient for 2 camera places. A hut width of 1600mm would be a bit more comfortable for 2 photographers, but 90% of the times I use it I probably sit alone in the hut.
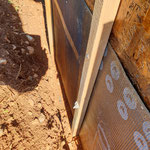
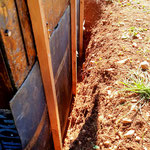
In addition, a second outer layer with 11mm OSB panels was added for the areas embedded in the floor. All side walls inside and outside are painted with wood preservatives (water-based), the OSB panels used in the floor area are additionally protected against moisture from the ground with 4mm bitumen sheets. The components around the base plate were additionally protected with fountain foam.
The roof was designed with a batten construction, after the construction 2 overlapping bitumen sheets were laid and screwed with 5x5cm squared timber in the outside area on the left and right, as well as the middle timber also only in the overhanging roof area.
No screw connections in the actual roof area of the hut!
The side parts are assembled with 4x3 carriage bolts, the lower base frame is connected to the bottom part with 4 wood screws. All parts are sprayed with all-weather silicone before they are screwed together, the roof is laid loosely and secured on the inside with 2 wood screws.


Here some Drawings with more Details, if you are interested.
If you have Questions contact me.
Kommentar schreiben